
| 일 | 월 | 화 | 수 | 목 | 금 | 토 |
|---|---|---|---|---|---|---|
| 1 | 2 | 3 | 4 | 5 | ||
| 6 | 7 | 8 | 9 | 10 | 11 | 12 |
| 13 | 14 | 15 | 16 | 17 | 18 | 19 |
| 20 | 21 | 22 | 23 | 24 | 25 | 26 |
| 27 | 28 | 29 | 30 | 31 |
- 국비지원코딩
- 웅진씽크빅
- ios
- 플러터
- 0원코딩인강
- 내일배움카드인강
- 웹개발
- 러닝핏
- 국비지원파이썬
- Flutter
- 앱개발
- 국비코딩
- 스나이퍼팩토리
- 개발
- 개발자부트캠프
- 습관챌린지
- Udemy
- 러닝핏습관챌린지
- 내일배움카드사용처
- K디지털기초역량훈련
- 인사이드아웃
- IT개발캠프
- 부트캠프
- 러닝핏인강
- 내일배움투어
- 안드로이드
- 유데미
- K디지털크레딧
- 코딩국비지원
- 고용노동부국비지원
- Today
- Total
매일 땡기는 마라 코딩
[인프런] 유튜브 사이트 만들기 (2) 본문
따라하며 배우는 노드, 리액트 시리즈 - 유튜브 사이트 만들기 강의
[무료] 따라하며 배우는 노드, 리액트 시리즈 - 유튜브 사이트 만들기 - 인프런 | 강의
이 강의를 통해 리액트와 노드의 개념을 익히는 것뿐만이 아닌 실질적으로 어떻게 웹사이트를 만들 수 있는지를 배울 수 있습니다., - 강의 소개 | 인프런...
www.inflearn.com
※ 해당 링크 강의 내용을 바탕으로 작성된 포스팅입니다.
디테일 비디오 페이지에 Side 비디오 생성
1. Side Video 부분 Layout template 만들기
- boilerplate-mern-stack-master\client\src\components\views\VideoDetailPage 경로에 Sections 폴더 생성.
- boilerplate-mern-stack-master\client\src\components\views\VideoDetailPage\Sections 경로에 SideVideo.js 파일 생성 및 코드 작성.
SideVideo.js
import React from 'react'

function SideVideo() {
  return (
    <div>
        SideVideo
    </div>
  )
}

export default SideVideo
VideoDetailPage.js
//import Axios from "axios";
import SideVideo from './Sections/SideVideo'; //SideVideo.js를 연결
<Col lg={6} xs={24}>
<SideVideo />
</Col>
2. 한 개의 카드 template 만들기
SideVideo.js
    return (
        <div style={{ display: 'flex', marginBottom: "1rem", padding: '0 2rm' }}>
            <div style={{ width: '40%', marginBottom: '1rem' }}>
                <a href>
                    <img style={{ width: '100%' }} src alt />
                </a>
            </div>

            <div style={{ width: '50%' }}>
                <a href>
                    <span style={{ fontSize: '1rem', color: 'black' }}>videoTitle</span><br />
                    <span>videoWriterName</span><br />
                    <span>videoViews</span><br />
                    <span>Time</span>
                </a>
            </div>

        </div>
    )
3. DB에서 모든 비디오 데이터 불러오기
SideVideo.js
import React, { useEffect, useState } from 'react'
import Axios from 'axios';

function SideVideo() {

    const [sideVideos, setsideVideos] = useState([])

    useEffect(() => {
    //랜딩 페이지에서 불러온 비디오 데이터 api 사용
        Axios.get('/api/video/getVideos')
        .then(response => {
            if(response.data.success) {
                console.log(response.data)
                setsideVideos(response.data.videos)
            } else {
                alert('비디오 가져오기를 실패했습니다.')
            }
        })

    }, [])
4. 불러온 데이터 화면에 출력
SideVideo.js
    const renderSideVideo = sideVideos.map((video, index) => {

        var minutes = Math.floor(video.duration / 68);
        var seconds = Math.floor((video.duration - minutes * 60));

        return <div key={index} style={{ display: 'flex', marginBottom: "1rem", padding: '0 2rm' }}>
        <div style={{ width: '40%', marginRight: '1rem' }}>
            <a href>
                <img style={{ width: '100%', height: '100%' }} src={`http://localhost:5000/${video.thumbnail}`} alt="thumbnail" />
            </a>
        </div>

        <div style={{ width: '50%' }}>
            <a href style={{ color: 'gray' }}>
                <span style={{ fontSize: '1rem', color: 'black' }}>{video.title}</span><br />
                <span>{video.writer.name}</span><br />
                <span>{video.views} views </span><br />
                <span>{minutes} : {seconds}</span>
            </a>
        </div>

    </div>


    })

    return (

        <React.Fragment>
            <div style={{ marginTop: '3rem' }} />

            {renderSideVideo}
        </React.Fragment>


    )
구독 기능 (1)
1. Subscriber Model 만들기

- boilerplate-mern-stack-master\server\models 경로에 Subscriber.js 파일 생성하고 Video.js 코드 복사 및 수정.
Subscriber.js
const mongoose = require('mongoose');
const Schema = mongoose.Schema;

const subscriberSchema = mongoose.Schema({

    userTo: {
        type: Schema.types.ObjectId,
        ref:'User'
    },
    userFrom: {
        type: Schema.types.ObjectId,
        ref:'User'
    }

}, { timestamps: true }) //만든날과 업데이트날 표시


const Subscriber = mongoose.model('Subscriber', subscriberSchema);

module.exports = { Subscriber }
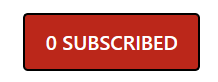
2. Subscribe Button UI 만들기
- boilerplate-mern-stack-master\client\src\components\views\VideoDetailPage\Sections경로에 Subscribe.js 파일 생성.
Subscribe.js
import React from 'react'

function Subscribe() {
    return (
        <div>
            <button
                style={{
                    backgroundColor: '#CC0000', borderRadius: '4px',
                    color: 'white', padding: '10px 16px',
                    fontWeight: '500', fontSize: '1rem', textTransform: 'uppercase'
                }}
                onClicks
            >
                0 Subscribe
            </button>
        </div>
    )
}

export default Subscribe
VideoDetailPage.js
//import SideVideo from './Sections/SideVideo'; //SideVideo.js를 연결
import Subscribe from './Sections/Subscribe'; //Subscribe.js를 연결
<List.Item
actions={[<Subscribe/>]}
>
3. 데이터베이스에서 유저 구독자 수 정보 가져오기
VideoDetailPage.js
//    if(VideoDetail.writer) { //이미지가 로딩 전에 렌더링되어 나는 오류를 방지
         // userFrom과 userTo이 다르면 버튼이 안 나오도록(내가 작성자거나 비회원)
        const subcribeButton = VideoDetail.writer._id !== localStorage.getItem('userId') && <Subscribe userTo={VideoDetail.writer._id} userFrom={localStorage.getItem('userId')} />
<List.Item
actions={[ subcribeButton ]}
>Subscribe.js
import Axios from 'axios'
import React, { useEffect, useState } from 'react'

function Subscribe(props) {

    const [SubscribeNumber, setSubscribeNumber] = useState(0)

    useEffect(() => {

        let variable = { userTo: props.userTo } //몇 명의 구독자가 있는지

        Axios.post('/api/subscribe/subscribeNumber', variable)
            .then(response => {
                if(response.data.success) {
                    setSubscribeNumber(response.data.subscribeNumber)
                } else {
                    alert('구독자 수 정보를 받아오지 못했습니다.')
                }
            })

}, [])- boilerplate-mern-stack-master\server\routes 경로에 subscribe.js 파일 생성, Video 코드 복사 및 수정.
subscribe.js
const express = require('express');
const router = express.Router();

const { Subscriber } = require("../models/Subscriber");

//=================================
//             Subscribe
//=================================


router.post('/subscribeNumber', (req, res) => {

    Subscriber.find({ 'userTo': req.body.userTo })
    .exec((err, subscribe) => { //userTo를 구독하는 모든 case가 들어있음. 3명이 구독하면 3개의 case
        if(err) return res.status(400).send(err);
        return res.status(200).json({ success: true, subscribeNumber: subscribe.length })
    })

});


module.exports = router;
index.js
//app.use('/api/video', require('./routes/video'));
app.use('/api/subscribe', require('./routes/subscribe'));
4. 내가 구독하는 유저 정보 가져오기
- 로그인할 때 유저 Id만 임의적으로 localStorage에 넣어 주고 어느 곳에서나 쓸 수 있게 해 둠.

Subscribe.js
//    const [subscribeNumber, setSubscribeNumber] = useState(0)
    const [Subscribed, setSubscribed] = useState(false)
let subscribedVariable = { userTo: props.userTo, userFrom: localStorage.getItem('userId') }
Axios.post('/api/subscribe/subscribed', subscribedVariable)
.then(response => {
if(response.data.success) {
setSubscribed(response.data.subscribed)
} else {
alert('정보를 받아오지 못했습니다.')
}
})
// }, [])subscribe.js
router.post('/subscribed', (req, res) => {

    Subscriber.find({'userTo': req.body.userTo, 'userFrom': req.body.userFrom })
    .exec((err, subscribe) => { //length가 1이면 구독을 하고 있다는 것. 0이면 구독 x
        if(err) return res.status(400).send(err);
        let result = false //구독 x
        if(subscribe.length !== 0) { //length가 0이 아니라면
            result = true //구독 중
        }
        res.status(200).json({ success: true, subscribed: result })
    })

});


//module.exports = router;
5. 가져온 정보 화면에 출력
subscribe.js
            <button
                style={{
                    backgroundColor: `${ Subscribed ? '#AAAAAA' : '#CC0000' }`, borderRadius: '4px',
                    color: 'white', padding: '10px 16px',
                    fontWeight: '500', fontSize: '1rem', textTransform: 'uppercase'
                }}
                onClicks
            >
                {SubscribeNumber} {Subscribed ? 'Subscribed': 'Subscribe'}
            </button>


구독 기능 (2)

- 먼저, 필요한 데이터들을 props를 통해 불러와준다.
Subscribe.js
//    }, [])

    const onSubscribe = () => {

        let subscribedVariable = { //자신과 업로더의 id가 필요

            userTo: props.userTo,
            userFrom: props.userFrom

        }

        if(Subscribed) { //이미 구독중이면

        } else { //구독 중이 아니면

        }

} onClick={onSubscribe}VideoDetailPage.js
actions={[<Subscribe userTo={VideoDetail.writer._id} userFrom={localStorage.getItem('userId')} />]}
1. 구독하기 기능 만들기
Subscribe.js
} else { //구독 중이 아니면

            Axios.post('/api/subscribe/subscribe', subscribedVariable)
                .then(response => {
                    if(response.data.success) {
                        setSubscribeNumber(SubscribeNumber + 1)
                        setSubscribed(!Subscribed)
                    } else {
                        alert('구독하는데 실패했습니다.')
                    }
                })

        }
subscribe.js
router.post('/subscribe', (req, res) => {
    //구독이므로 DB에 userTo와 userFrom을 저장
    const subscribe = new Subscriber(req.body)

    subscribe.save((err, doc) => {
        if(err) return res.json({ success: false, err })
        res.status(200).json({ success: true })
    })

});
2. 구독 취소하기 기능 만들기
Subscribe.js
if(Subscribed) { //이미 구독중이면

            Axios.post('/api/subscribe/unSubscribe', subscribedVariable)
                .then(response => {
                    if(response.data.success) {
                        setSubscribeNumber(SubscribeNumber - 1) //현재 구독자 수 -1
                        setSubscribed(!Subscribed) //현 상태와 반대
                    } else {
                        alert('구독 취소하는데 실패했습니다.')
                    }
                })
subscribe.js
router.post('/unSubscribe', (req, res) => {
    //구독 취소이므로 userTo와 userFrom을 찾아 없애줌
    Subscriber.findOneAndDelete({ userTo: req.body.userTo, userFrom: req.body.userFrom })
        .exec((err, doc) => {
            if(err) return res.status(400).json({ success: false, err })
            res.status(200).json({ success: true, doc })
        })

});


수많은 오타 찾아서 해결...

subscribe 라우터 구독 취소 부분에 findOneAndDelete 명령어를 ()가 아닌 []로 사용하고 있었음. 해결, DB에서 잘 삭제되는 것도 확인.
구독 비디오 페이지
1. 빈 Subscription 페이지 생성
- boilerplate-mern-stack-master\client\src\components\views 경로에 SubscriptionPage 폴더 생성.
- boilerplate-mern-stack-master\client\src\components\views\SubscriptionPage 경로에 SubscriptionPage.js 파일 생성.
SubscriptionPage.js
import React from 'react'

function SubscriptionPage() {
  return (
    <div>
        SubscriptionPage
    </div>
  )
}

export default SubscriptionPage- 페이지를 메뉴에 올려 주기 위해 LeftMenu.js 코드를 수정한다.
LeftMenu.js
import React from 'react';
import { Menu } from 'antd';
const SubMenu = Menu.SubMenu;
const MenuItemGroup = Menu.ItemGroup;

function LeftMenu(props) {
  return (
    <Menu mode={props.mode}>
    <Menu.Item key="mail">
      <a href="/">Home</a>
    </Menu.Item>
    <Menu.Item key="subscription">
      <a href="/subscription">Subscription</a>
    </Menu.Item>
  </Menu>
  )
}

export default LeftMenu
2. Subscription Page를 위한 Route 만들기
App.js
//import VideoDetailPage from "./views/VideoDetailPage/VideoDetailPage"
import SubscriptionPage from './views/SubscriptionPage/SubscriptionPage';
// <Route exact path="/video/:videoId" component={Auth(VideoDetailPage, null)} />
<Route exact path="/subscription" component={Auth(SubscriptionPage, null)} />
3. Template 만들기
- 비슷한 양식인 LandingPage.js의 코드를 SubscriptionPage.js에 복사해 온다.
SubscriptionPage.js
import React, { useEffect, useState } from 'react'
import { FaCode } from "react-icons/fa";
import { Card, Icon, Avatar, Col, Typography, Row } from 'antd';
import Axios from 'axios';
import moment from 'moment';
const { Title } = Typography
const { Meta } = Card;

function SubscriptionPage() {

    const [Video, setVideo] = useState([])

    useEffect(() => { //페이지가 로드되면 실행, input이 없으면 계속 실행
        Axios.get('/api/video/getSubscriptionVideos')
        .then(response => {
            if(response.data.success) {
                console.log(response.data)
                setVideo(response.data.videos)
            } else {
                alert('비디오 가져오기를 실패했습니다.')
            }
        })

    }, [])//[]가 있으면 한 번만 실행

    const renderCards = Video.map((video, index) => {

        var minutes = Math.floor(video.duration / 68);
        var seconds = Math.floor((video.duration - minutes * 60));

        return <Col lg={6} md={8} xs={24}>
            <div style={{ position: 'relative'}}>
                <a href={`/video/${video._id}`} >
                    <img style={{ width: '100%' }} src={`http://localhost:5000/${video.thumbnail}`} alt="thumbnail" />
                    <div className='duration'>
                        <span>{minutes} : {seconds}</span>
                    </div>
                </a>
            </div><br />
            <Meta
                avatar={
                    <Avatar src={video.writer.image} />
                }
                title={video.title}
            />
            <span>{video.writer.name}</span><br />
            <span style={{ marginLeft: '3rem' }}>{video.views} views</span> - <span>{moment(video.createdAt).format("MMM Do YY")}</span>
        </Col>
    })

    return (
        <div style={{ width: '85%', margin: '3rem auto' }}>
            <Title level={2}> Recommended </Title>
            <hr />
            <Row gutter={[32, 16]}>


                {renderCards}


            </Row>
        </div>
    )
}

export default SubscriptionPage
4. 내가 구독한 유저의 비디오들만 서버에서 가져오고 비디오들을 화면에 출력
- LandingPage.js의 코드를 가져왔기 때문에 출력 부분은 따로 수정해 주지 않아도 된다.
video.js
const { Subscriber } = require("../models/Subscriber");router.post('/getSubscriptionVideos', (req, res) => {
// 자신의 아이디를 가지고 구독하는 사람들을 찾는다.
Subscriber.find({ userFrom: req.body.userFrom })
.exec((err, subscriberInfo) => { //subscriberInfo는 userFrom이 userTo를 구독하고 있는 정보
if(err) return res.status(400).send(err);
let subscribedUser = [];
// subscribedUser 변수 안에 userTo 정보를 넣는 과정
subscriberInfo.map((subscriber, i) => {
subscribedUser.push(subscriber.userTo);
})
// 찾은 사람들의 비디오를 가지고 온다.
Video.find({ writer: { $in: subscribedUser } })
//writer: req.body.id 명령어 불가능, subscribedUser가 여러 명일 수 있기 때문.
//$in을 이용하면 몇 명이든 subscribedUser에 있는 id를 가지고 writer를 찾을 수 있다.
.populate('writer')
.exec((err, videos) => {
if(err) return res.status(400).send(err);
res.status(200).json({ success: true, videos })
})
})
});SubscriptionPage.js
useEffect(() => {

        const subscriptionVariables = { //본인의 구독 실황을 찾기 위해 본인 id 필요
            userFrom: localStorage.getItem('userId')
        }

        Axios.post('/api/video/getSubscriptionVideos', subscriptionVariables)
        .then(response => {
            if(response.data.success) {
                console.log(response.data)
                setVideo(response.data.videos)
            } else {
                alert('비디오 가져오기를 실패했습니다.')
            }
        })

    }, [])
댓글 기능 생성 (1) 구조 설명
1. 댓글 부분 구조 설명

- 모든 댓글은 답글이 가능하도록 한다. ROOT COMMENT FORM은 화면 맨 아래에 있는 댓글 작성 폼이며, 댓글이나 답글에 나오는 폼은 COMMENT FORM이다.
- Reply Comment에는 Single Comment와 ReplyComment가 같이 포함되어 답글이 무한정으로 늘어날 수 있게 하였다.
2. Comment model 생성

- boilerplate-mern-stack-master\server\models 경로에 Comment.js 파일 생성 후, Subscriber.js 코드 복사 및 수정.
Comment.js (models)
const mongoose = require('mongoose');
const Schema = mongoose.Schema;

const commentSchema = mongoose.Schema({

    writer: { //작성자
        type: Schema.Types.ObjectId,
        ref: 'User'
    },
    postId: { //VideoId
        type: Schema.Types.ObjectId,
        ref: 'Video'
    },
    responseTo: {
        type: Schema.Types.ObjectId,
        ref: 'User'
    },
    content: { //내용
        type: String
    }

}, { timestamps: true }) //만든날과 업데이트날 표시


const Comment = mongoose.model('Comment', commentSchema);

module.exports = { Comment }- root Reply Comment는 ReplyTo(responseTo)가 없다. 답글이 생성되면 root Reply Comment가 ReplyTo가 된다.
3. 비디오 디테일 페이지에 Comment Component 만들기
- boilerplate-mern-stack-master\client\src\components\views\VideoDetailPage\Sections 경로에 Comment.js 파일 생성.
Comment.js (Sections)
import React from 'react'

function Comment() {
  return (
    <div>
        Comment
    </div>
  )
}

export default Comment
VideoDetailPage.js
// import Subscribe from './Sections/Subscribe'; //Subscribe.js를 연결
import Comment from './Sections/Comment';
// {/* Comments */}
<Comment />댓글 기능 생성 (2) Comment.js

- Commet.js에서 구현한 Submit 버튼을 누르면 VideoDetailPage.js의 state에 Commens에 대한 모든 정보가 담긴다.
1. Comment.js를 위한 template 만들기
Comment.js (Sections)
import React from 'react'

function Comment() {
    return (
        <div>
            <br />
            <p> Replies </p>
            <hr />

            {/* Comment Lists */}

            {/* Root Comment Form */}

            <form style={{ display: 'flex' }} onSubmit >
                <textarea
                    style={{ width: '100%', borderRadius: '5px' }}
                    onChange
                    value
                    placeholder="코멘트를 작성해 주세요"

                />
                <br />
                <button style={{ width: '20%', height: '52px' }} onClick >Submit</button>
            </form>
        </div>
    )
}

export default Comment
2. handleChange func 만들기
Comment.js (Sections)
//function Comment() {

    const [commentValue, setcommentValue] = useState("")

    const handleClick = (event) => {
        setcommentValue(event.currentTarget.value)
    }
onChange={handleClick}
value={commentValue}
3. OnSubmit func 만들고, 모든 Comment 정보들을 데이터베이스에서 가져오기
Comment.js (Sections)
import { useSelector } from 'react-redux';

function Comment(props) {

    const videoId = props.postId;
    const user = useSelector(state => state.user);
const onSubmit = (event) => {
event.preventDefault(); //버튼을 눌렀을 때 페이지 리프레시가 되지 않도록
const variables = {
content: commentValue,
writer: user.userData._id, //redux에서 가져오는 방법
postId: videoId
}
Axios.post('/api/comment/saveComment', variables)
.then(response => {
if(response.data.success) {
console.log(response.data.result)
setCommentValue("")
} else {
alert('커맨드를 저장하지 못했습니다.')
}
})
}
// return ( <form style={{ display: 'flex' }} onSubmit={onSubmit} > <button style={{ width: '20%', height: '52px' }} onClick={onSubmit} >Submit</button>VideoDetailPage.js
<Comment postId={videoId}/>- boilerplate-mern-stack-master\server\routes 경로에 comment.js 파일 생성 후, subscribe.js 코드 복사 및 수정.
comment.js
const express = require('express');
const router = express.Router();

const { Comment } = require("../models/Comment");

//=================================
//             Comment
//=================================


router.post("/saveComment", (req, res) => {

    const comment = new Comment(req.body)

    comment.save((err, comment) => {
        if(err) return res.json({ success: false, err })

        Comment.find({'_id': comment._id}) //save를 쓸 때는 단독으로 populate를 쓸 수 없다.
            .populate('writer')
            .exec((err, result) => {
                if(err) return res.json({ success: false, err })
                res.status(200).json({ success: true, result })
            })
    })

});


module.exports = router;
index.js
//app.use('/api/subscribe', require('./routes/subscribe'));
app.use('/api/comment', require('./routes/comment'));
4. 저장된 댓글 데이터를 Parent Componet로 업데이트
- SingleComment.js에서 submit한 데이터를 VideoDetailPage.js Comments state에 저장.
VideoDetailPage.js
    const refreshFunction = (newComment) => {
        setComments(Comments.concat(newComment))
    }
<Comment refreshFunction={refreshFunction} commentLists={Comments} postId={videoId}/>VideoDetailPage.js
                if(response.data.success) {
                    console.log(response.data.result)
                    props.refreshFunction(response.data.result)
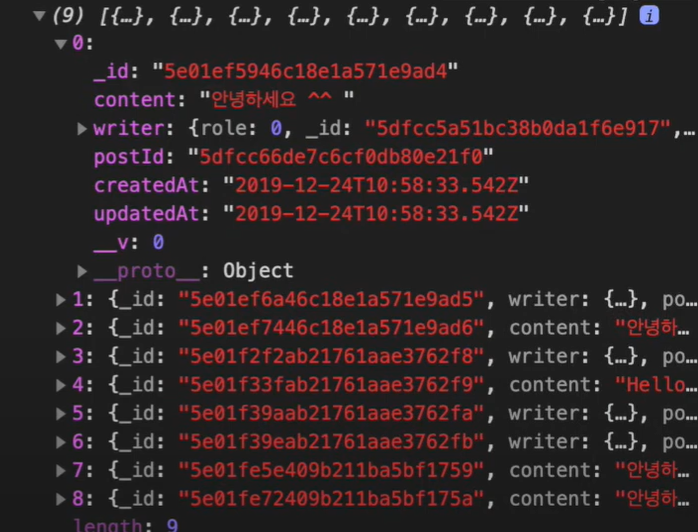
5. 콘솔창에서 댓글 리스트 확인
Comment.js (Sections)에 있는 요 코드로
console.log(response.data.result)
댓글 기능 생성 (3) SingleComment
1. Comment.js에 SingleComment Component를 생성
Comment.js
// import { useSelector } from 'react-redux';
import SingleComment from './SingleComment';
{/* Comment Lists */}
<SingleComment />- boilerplate-mern-stack-master\client\src\components\views\VideoDetailPage\Sections 경로에 SingleComment.js 파일 생성.
SingleComment.js
import React from 'react'

function SingleComment() {
  return (
    <div>
        SingleComment
    </div>
  )
}

export default SingleComment
2. Single Comment를 위한 Templaet 생성
SingleComment.js
//import React from 'react'
import { Comment, Avatar, Button, Input } from 'antd';

const { TextArea } = Input;
<div>
<Comment
actions
author
avatar={<Avatar src alt />}
content
/>
<form style={{ display: 'flex' }} onSubmit >
<textarea
style={{ width: '100%', borderRadius: '5px' }}
onChange
value
placeholder="코멘트를 작성해 주세요"
/>
<br />
<button style={{ width: '20%', height: '52px' }} onClick >Submit</button>
</form>
</div>
3. Open Reply func와 handleChange func 만들기
SingleComment.js
import React, { useState } from 'react'function SingleComment() {
const [OpenReply, setOpenReply] = useState(false)
const [CommentValue, setCommentValue] = useState("")
const onClickReplyOpen = () => { //답글 작성 폼 오픈
setOpenReply(!OpenReply)
}
const onHandleChange = (event) => {
setCommentValue(event.currentTarget.value)
}
const actions = [ //답글 작성 폼 숨김 기능
<span onClick={onClickReplyOpen} key="comment-basic-reply-to">Reply to</span>
] actions={actions} onChange={onHandleChange}
value={CommentValue}
4. onSubmit func 만들고, 모든 Comment 정보들을 데이터베이스에서 가져오기
- Comment.js (Secitons)에서 onSubmit 코드를 가져와서 수정.
SingleComment.js
import { useSelector } from 'react-redux';
import Axios from 'axios'

const { TextArea } = Input;

function SingleComment(props) {

    const user = useSelector(state => state.user);
const onSubmit = (event) => {
event.preventDefault();
const variables = {
content: CommentValue,
writer: user.userData._id, //redux에서 가져오는 방법
postId: props.postId,
responseTo: props.comment._id //Comment.js의 onSubmit과 다른 부분
}
Axios.post('/api/comment/saveComment', variables)
.then(response => {
if(response.data.success) {
console.log(response.data.result)
setCommentValue("")
} else {
alert('커맨드를 저장하지 못했습니다.')
}
})
} <Comment
actions={actions}
author={props.comment.writer.name}
avatar={<Avatar src={props.comment.writer.image} alt />}
content={ <p> {props.comment.content} </p> }
/> <form style={{ display: 'flex' }} onSubmit={onSubmit} > <button style={{ width: '20%', height: '52px' }} onClick={onSubmit} >Submit</button>
VideoDetailPage.js
    const [Comments, setComments] = useState([])

    useEffect(() => {

        Axios.post("/api/comment/getComments", variable)
            .then(response => {
                if(response.data.success) {
                    setComments(response.data.comments)
                } else {
                    alert('코멘트 정보를 가져오는 것을 실패하였습니다.')
                }
            })
<Comment commentLists={Comments} postId={videoId}/>comment.js
router.post('/getComments', (req, res) => {

    Comment.find({ "postId": req.body.videoId })
        .populate('writer')
        .exec((err, comments) => {
            if(err) return res.status(400).send(err)
            res.status(200).json({ success: true, comments })
        })

});
Comment.js (Sections)
            {props.commentLists && props.commentLists.map((comment, index) => (
                (!comment.responseTo && //답글이 없는 댓글만 출력
                    <SingleComment comment={comment} postId={videoId}/>
                )
            ))}
5. 저장된 댓글을 Parent Component에 업데이트
- SingleComment.js에서 submit한 데이터를 VideoDetailPage.js Comments state에 저장.
Comment.js
                    <SingleComment refreshFunction={props.refreshFunction} comment={comment} postId={videoId}/>
                    //오류난 코드 <SingleComment refreshFunction={refreshFunction} comment={comment} postId={videoId}/>
SingleComment.js
                if(response.data.success) {
                    console.log(response.data.result)
                    props.refreshFunction(response.data.result)
오류 해결 안 돼서 주석 처리하고 다른 부분부터 하기로 했다...
→ refreshFunction={props.refreshFunction}으로 하니 해결.

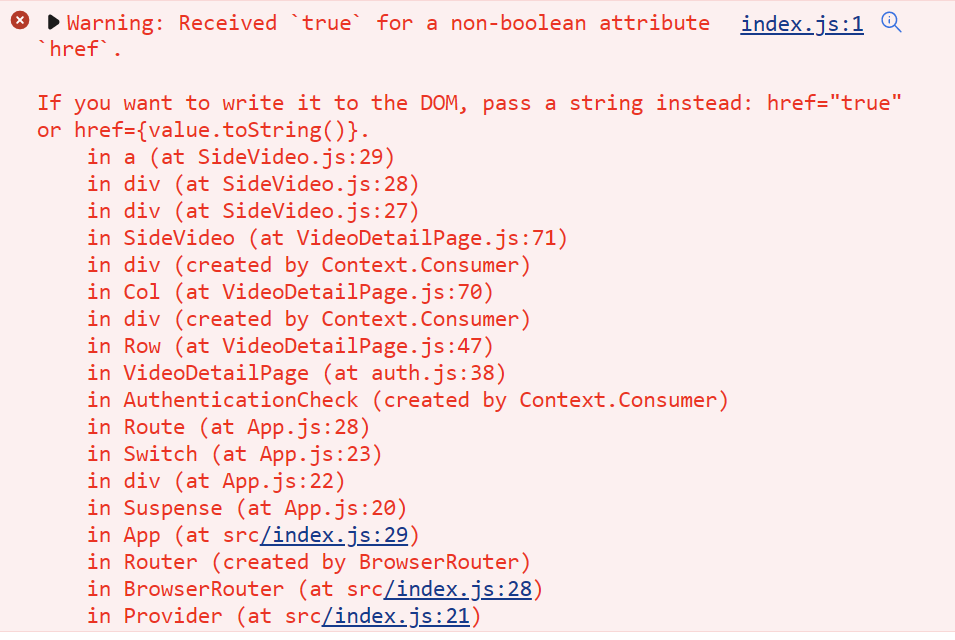
근데 이건 무슨 오류지
댓글 기능 생성 (4) ReplyComment
1. ReplyComment Component를 Comment.js에 만들기
- 리액트에서는 JSX를 HTML 대신 사용.
Comment.js
import ReplyComment from './ReplyComment'; (!comment.responseTo && //답글이 없는 댓글만 출력
<React.Fragment>
<SingleComment refreshFunction={props.refreshFunction} comment={comment} postId={videoId}/>
<ReplyComment />
</React.Fragment>
//<SingleComment refreshFunction={refreshFunction} comment={comment} postId={videoId}/>
)- boilerplate-mern-stack-master\client\src\components\views\VideoDetailPage\Sections 경로에 ReplyComment.js 파일 생성.
ReplyComment.js
import React from 'react'

function ReplyComment() {
    return (
        <div>
            ReplyComment
        </div>
    )
}

export default ReplyComment
2. ReplyComment 템플릿 만들기
ReplyComment.js
import React from 'react'
import SingleComment from './SingleComment'

function ReplyComment(props) {
    // 답글이 여러 개가 될 수 있으니까 변수로 만들기
    const renderReplyComment = (parentCommentId) =>
        props.commentLists.map((comment, index) => ( //댓글 정보 가져오기
            <React.Fragment>
                {
                    comment.responseTo === parentCommentId &&
                        <div style={{ width: '80%', marginLeft:'40px'}}>
                            <SingleComment refreshFunction={props.refreshFunction} comment={comment} postId={props.videoId}/>
                            <ReplyComment commentLists={props.commentLists} parentCommentId={comment._id} postId={props.videoId}/>
                        </div>
                }
            </React.Fragment> //댓글 아이디와 아이디의 답글만 랜더링
    ))

    return (
        <div>

            <p style={{ fontSize: '14px', margin: 0, color: 'gray' }} onClick>
                View 1 more comment(s)
            </p>

            {renderReplyComment(props.parentCommentId)}

        </div>
    )
}

export default ReplyComment
Comment.js
<ReplyComment parentCommentId={comment._id} postId={videoId} commentLists={props.commentLists}/>
3. Calculate Child Comment Number, onHandleChange func 만들기
ReplyComment.js
import React, { useEffect, useState } from 'react'
import SingleComment from './SingleComment'

function ReplyComment(props) {

    const [ChildCommentNumber, setChildCommentNumber] = useState(0)
    const [OpenReplyComments, setOpenReplyComments] = useState(false)

    useEffect(() => { //답글이 몇 개인지

        let commentNumber = 0;

        props.commentLists.map((comment) => {
            if(comment.responseTo === props.parentCommentId) {
                commentNumber ++
            }
        })

        setChildCommentNumber(commentNumber)

    }, [])
const onHandleChange = () => {
setOpenReplyComments(!OpenReplyComments)
}
return (
<div>
{ChildCommentNumber> 0 &&
<p style={{ fontSize: '14px', margin: 0, color: 'gray' }} onClick={onHandleChange}>
View {ChildCommentNumber} more comment(s)
</p>
}
{OpenReplyComments &&
renderReplyComment(props.parentCommentId)
}
</div>
)

Comment.js
<ReplyComment refreshFunction={props.refreshFunction} parentCommentId={comment._id} postId={videoId} commentLists={props.commentLists}/>ReplyComment.js
<ReplyComment refreshFunction={props.refreshFunction} commentLists={props.commentLists} parentCommentId={comment._id} postId={props.videoId}/>
4. 기타 수정사항
- useEffect의 마지막 줄 []를 비워두면 DOM이 Load될 때 한 번 실행. commentNumber가 바뀔 때마다 실행하게 하려면 props.CommentLists를 넣어야 한다.
ReplyComment.js
    useEffect(() => { //답글이 몇 개인지

        (중략)

    }, [props.commentLists])
- 답글의 댓글 작성버튼 누르면 답글 작성 폼 숨김.
SingleComment.js
                    setCommentValue("")
                    setOpenReply(false)


'클론코딩' 카테고리의 다른 글
| [인프런] 맛집지도 만들기 (2) (0) | 2023.01.26 |
|---|---|
| [인프런] 맛집지도 만들기 - 퀴즈 1 (0) | 2023.01.25 |
| [인프런] 맛집지도 만들기 (1) (0) | 2023.01.22 |
| [인프런] 유튜브 사이트 만들기 (3) (0) | 2023.01.22 |
| [인프런] 유튜브 사이트 만들기 (1) (0) | 2023.01.06 |


